Renew And Refresh
With Springtime DIY Fun
Ahhh … spring. Its warm weather, fabulous flowers, and spectacular sunshine inspire us to spruce up our homes after a cold, wet winter. It’s a time for fun and whimsy, a time to freshen and brighten our surroundings. It’s a time to show our loved ones how much we care (yes, Mother’s Day is right around the corner … don’t forget!). And it’s a time to create and craft! So if your creative side is busting at the seams, but you need a little DIY inspiration, I’ve crafted a few simple ideas to help out.
Spring always makes me think of cute little bunnies, as they are always happily hopping through my yard this time of year. So naturally, crafting homemade sock bunnies comes to mind. These simple, no-sew little guys are so adorable, and are sure to bring “hoppiness” to “somebunny” special. They can also be used as book rests, set atop a bookshelf or end table, and would make the cutest favor for a bunny-themed baby shower.
For this project, you will need a long sock (no holes!), rice, embroidery thread, ribbon, pom-poms, scissors, a marker, and a hot glue gun (socks of spring colors are great to use for this craft). To begin, make the body by filling the sock with rice to just below the heel area, then tying off with the embroidery thread. Next, create the head by filling the heel area with rice, tying this off as well. The ears will come next – cut straight down the middle of the ankle piece to make two ears. At the end of each, cut and shape the material so that it resembles a pointed ear. Tie a coordinating ribbon around the bunny’s neck. Using your marker, draw its eyes, nose, mouth, and whiskers. Finally, glue the pom-pom onto the bunny’s “bottom.” If you want to take this project a bit further, use embellishments such as black rhinestones or “googly” eyes, a small pink pom-pom for the nose, and twine or yarn for the whiskers. You’ve now got a sock bunny crafted with love!
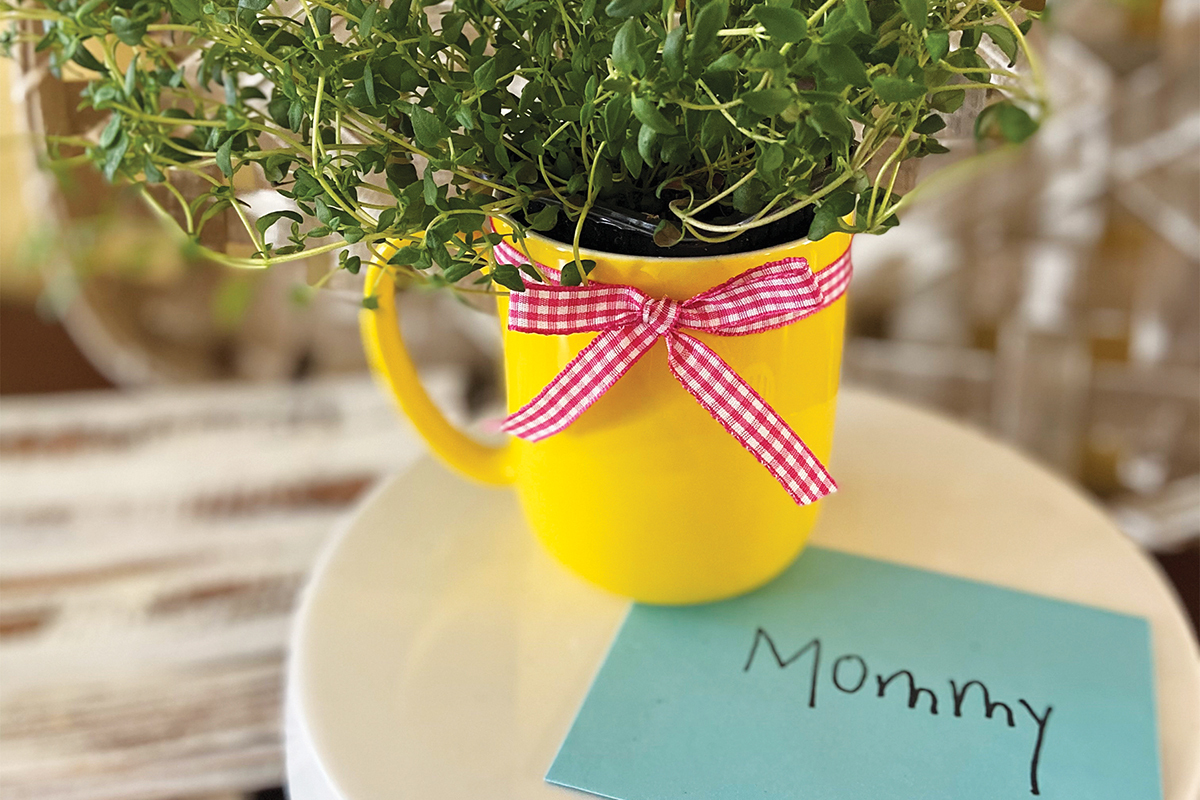
May welcomes a special day for honoring all the lovely ladies in our lives. I like to make Mother’s Day gifts that can be enjoyed all year long, to remind these women how much they are loved and appreciated. Herbs are so popular and easy to grow, allowing you to have fresh flavor enhancers right at your fingertips. Not only that, but they are also attractive and many have a wonderful scent. A potted herb is so simple, yet so lovely. For this springtime gift, head to the nearest garden center, pick out an herb, and grab some potting soil. Rosemary, thyme, and dill are great options, but consider what you think that lucky lady will like. Stop by your favorite dollar store and pick up a plain coffee mug. (A clay pot can also be used, perhaps decorated with little one’s thumbprints in the shape of a flower.) Then simply plant the herb in the coffee mug, adding extra potting soil to fill the cup. Be sure to push down the soil as you add it so that the roots have something in which to grow. For that extra touch of love, tie a pretty bow around the cup. Add a sweet note, and don’t forget to stick the herb’s care instructions in the mug as well. You have quickly created a special gift that is not only functional, but will remind your loved one of you every time she looks at it.
As June rolls around, my thoughts immediately turn to decking out my house in patriotic décor. What’s better than red, white, and blue decorations to prepare us for summer and all the good times coming up? I love fabric, but can’t sew a lick! However, I have found another simple no-sew craft that is fun and super cute, and allows me to tap into my love for it – fabric garland. This simple craft that can adorn your mantel is a perfect way to showcase your patriotism.
To get started, select up to 10 different red, white, and blue fabrics (fat quarters are perfect for this). Choose different patterns – chevron, gingham check, stripe, polka dots, whatever you prefer (try to have at least two solids). Some fabrics may need to be cut – if so, a quarter of a yard is perfect. The only other material you need is twine. Begin by cutting the fabric into 15-inch strips, one to one-and-a-half inches wide. Next, cut the twine to the length you desire. It can be any size that you want, but for reference, bunting for a fireplace mantel is generally 48 inches long. Be sure to add about eight inches to the length of twine so you will be able to tie it off and attach. Now it’s time to start attaching the fabric strips. Make sure that the “pretty” side of the fabric is facing out. Fold the strips in half so that the ends touch, forming a loop at the top. Place the loop one inch above the twine. Then pull the ends of the twine through the loop to attach. Pull down gently, and then tug on both ends to tighten around the twine. Repeat this process until you have a beautiful garland. I don’t go in any particular order, but you certainly can. If you find you really enjoy crafting fabric garland, these DIY decorations are perfect for hanging in a nursery or child’s bedroom, make fun and festive backdrops for a shower or graduation party (especially in the school’s colors), and are perfect for any holiday or birthday celebration.
I hope that you find these springtime projects as much fun to craft as I do. They are easy and affordable, but equally awesome and enjoyable. Here’s to a beautiful spring season from me to you!
Dolores Riggins
Co-owner of Southern Suds & Gifts, located at 213 S. White St. in Downtown Wake Forest, featuring over 35 craftsmen and artists.