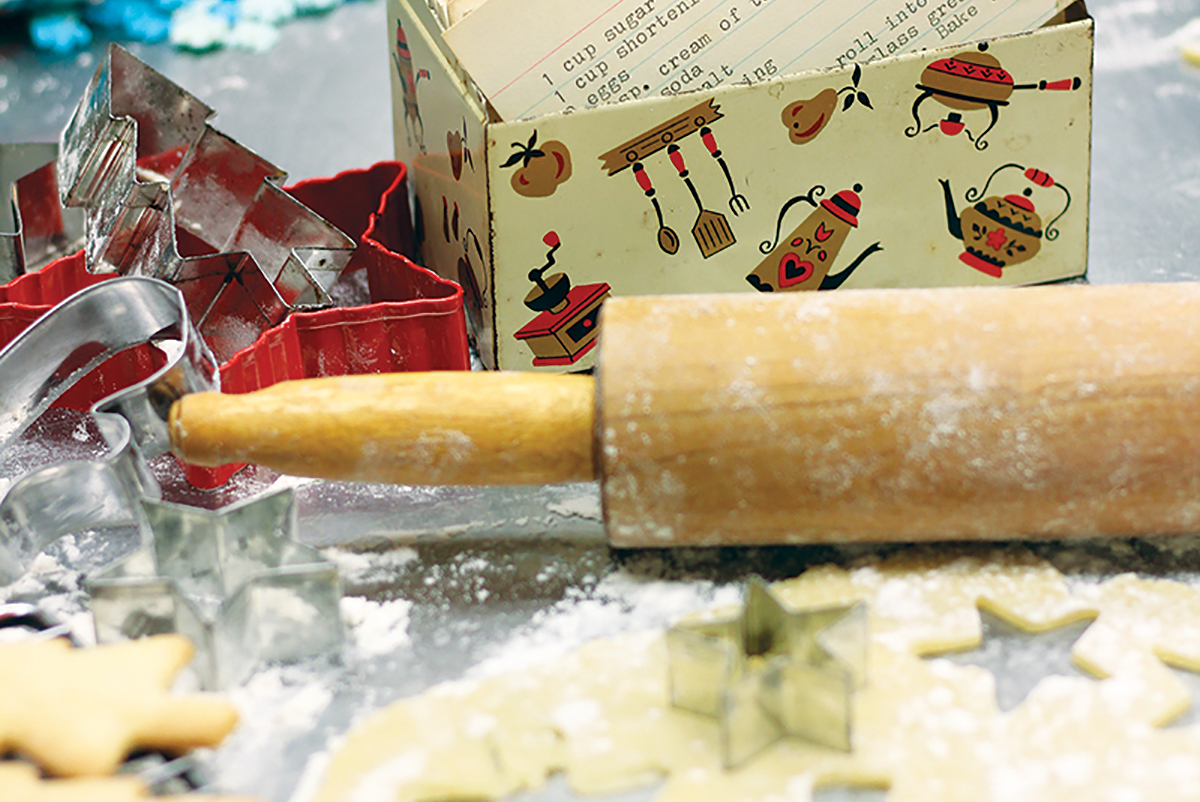
Grandma's Rolling Pin
Carrying On The Sugar Cookie Tradition
We all know tradition begins with family. My story is the classic tale of the little girl growing up at her grandmother’s elbow – I learned everything I know and love about baking from Grandma! Christmas was prime time for her. Every year, there were trays upon tins upon containers full of cookies of all shapes and sizes and flavors and origins. We made everything from traditional German Sanbakkels and Krumkake to whatever Grandma found in the latest issue of a magazine or from recipes shared by friends. But there was the one cookie that united us all in a family tradition – the sugar cookie. The recipe itself was one given to her by an old and dear friend, but quickly became a staple in her household. It had an honored place in her recipe box in the rather large section reserved for “Christmas Cookies and Bars.” It was well loved and frequently used.
I do remember being very young and watching with fascination as Grandma wielded her rolling pin, deftly taming the blob of sugar cookie dough into a thin layer of heavenly goodness. Then there was the flourish of excitement when I was presented with the huge tin of cookie cutters: stars, trees, Santa hats, reindeer, bells, stockings – cutting them out was my job early on. Finally, as a few years passed, I began learning how to use that rolling pin to tame the dough myself, carefully flouring the plastic mat to be sure the sticky dough came loose after the cutters pieced out those precious shapes, soon to be baked and decorated, then gently moving the shapes to cookie sheets for baking to a crisp and golden brown. It was always a game of precision to get those cookie cut-outs on the baking sheet with points and corners intact and not laying wildly askew in a shape nobody would recognize.
Of course, we had to do all the rolling and cutting and baking before we could get to the fun part – decorating! This is the part where the whole family came to the table, literally. My grandfather, mother, uncles, aunts, cousins, and even neighbors all joined in. We all sat around the large kitchen table sharing the colored frostings, the myriad of bright colored sugars; the many shapes, sizes, and colors of sprinkles; and those random candy pieces that looked pretty, but weren’t really all that tasty. Some of us carefully applying color and design, others simply layering on the gooey frosting and extra sprinkles. I swear my uncles tried their hardest to make the ugliest cookies, simply to outdo one another and get the biggest reaction from Grandma. And those poor cookies that broke during the frosting party were simply deemed fair game and eaten on the spot. There may even have been the intentionally broken cookie or two. We always laughed and sang along with the Christmas carols playing on my grandparents’ record player in the other room and teased Grandma about needing so many cookies (she did have to feed the entire neighborhood – everyone headed to her cookie tin first thing through the door). I don’t remember ever being happier as a kid – this was what family was to me. This was our tradition.
Of course, my decorating style matured as I did and I eventually took to gel colors, elaborate cookie shapes, and a paintbrush to make some of my sugar cookies quite the works of art. I love the sugar cookie recipe I am sharing with you. It is a great recipe to let kids work with – start a tradition that lets them get their hands in early. This dough is incredibly versatile and very forgiving for beginners. It makes great tasting cookies, whether they are super thick or very thin, and holds up nicely to handling – it isn’t terribly fragile in the hands of a youngster practicing the art of frosting. It is also very resilient; you can roll and re-roll (and re-roll) and it still stays pretty flaky and tasty. It also serves double duty as a Snickerdoodle cookie if you don’t want to take the time to do roll out cookies, but still desire a crisp and tender sweet treat.
Even after Grandma passed away and my family had all moved, I embraced the Christmas frosted sugar cookie tradition through the years. My family grew to include everyone in my circle – my mom, my college roommates, my co-workers, and my friends. With my continued love of baking, I was lucky enough to inherit Grandma’s rolling pin and recipe box. I use them every year. I put on some Christmas music, open up the dented and beloved recipe box, and reach up to the top pantry shelf for that trusty rolling pin. Tradition may begin with the family you grew up with, but it doesn’t have to end there. It can grow and travel as you do. My tradition is in my hands and in my heart, and I will gladly share it with anyone who wants a cookie!
Roll-Out Sugar Cookies
Makes 30-50 cookies, depending on the size of the cutters
– 1 cup butter
– 1 cup sugar
– 3 cups flour
– 1 teaspoon salt
– 1 teaspoon baking soda
– 1 teaspoon cream of tartar
– 2 eggs, beaten
– 2 tablespoons milk
– 1 teaspoon vanilla
– Flour for dusting
Cut the butter into small chunks and chill. Combine the dry ingredients in the bowl of a mixer: sugar, flour, salt, baking soda, and cream of tartar. In a small bowl, mix the wet ingredients: eggs, milk, and vanilla. Add the butter to the dry ingredients and mix on medium until the mixture resembles coarse crumbs. Add the wet ingredients and continue to mix, until well combined. The dough will be very sticky. Place in refrigerator until well chilled. Keep the dough refrigerated while rolling out portions of it.
Using a piece of dough, the size of a fist, roll out on a well-floured board or mat. Turn the dough over and re-flour often to be sure it isn’t sticking. When the dough reaches your desired thickness, cut out your favorite shapes with cookie cutters. A bench scraper works great for transferring the cookies to a baking sheet lined with parchment paper. Gather the scraps left after cutting and refrigerate. After you have rolled out and cut all the first round of dough, you can re-roll the scraps and cut out more cookies.
To use as Snickerdoodle batter, scoop the batter into balls using a spoon (or a small cookie scoop/disher). Roll the dough in-between your hands to form a nice round ball. Drop in a cinnamon-sugar mix and completely coat. Place the balls on a cookie sheet, lined with parchment. Flatten balls slightly and sprinkle a bit of the cinnamon-sugar mix on the top of each cookie. This can be done from the first mixing, or you can use this method to finish up the scraps of dough left from rolling out and cutting out sugar cookies.
Bake at 350 degrees for 8 minutes, then turn, bake another 4 minutes or until done.
Sugar Cookie Frosting
– 1½ cups powdered sugar
– 3 tablespoons butter, softened
– 1 tablespoons milk
– 1 teaspoon vanilla
– Food coloring (I prefer gel colors)
Mix the butter and powdered sugar together using a mixer. Add vanilla and milk (you can add more milk as needed to achieve desired consistency for frosting). Divide the frosting up into small containers and color each one to your tastes. I like the gel food coloring best, as it is more vibrant and doesn’t change the consistency of the frosting. Make more and color as needed.
Holly Hopkins
Holly has spent many years working with food, starting off at her Grandma’s elbow, making wedding cakes and cookies galore. Since then, she has been a manager and business owner and is thrilled to be combining her passions for high quality food and superior customer service at Chef Mario’s.
- chefmario@bellsouth.net
- www.chefmario.com
- 919-781-4141