Chalk It Up!

So the holidays are over and the festive, cheery decorations have been taken down and once again stored away in the attic. If you are like me, the spaces that felt so cozy with lights and added décor just a few weeks ago now feel barren and dull. But don’t fret! It’s a new year and the perfect time to spruce up your everyday décor with a little DIY creativity and elbow grease.
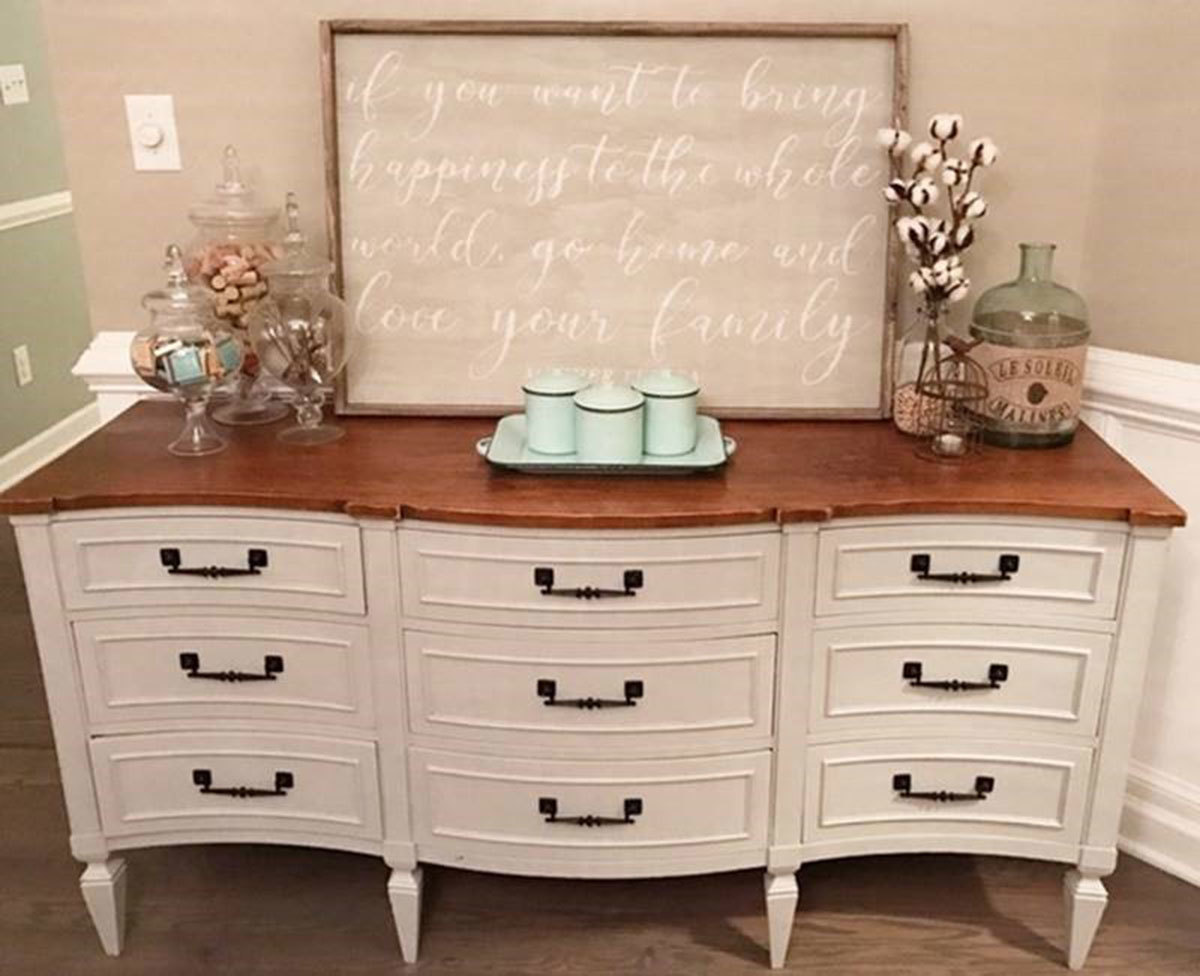
Many of us have accumulated furniture over the years from family and friends, or even new finds we’ve picked up to fix or refurbish, but just haven’t gotten around to tackling. This makes for a perfect project, especially when stuck inside on a cold, wintery day, and is one that can really add a little pop to any room. I love finding old dressers or vintage tables that need a little TLC and working my magic over the course of a few hours to really make them sing.
Do-it-yourself, or DIY, projects do not have to be complicated. In fact, DIY can be downright easy. One of my favorite ways to change up furniture in a room is to chalk paint it. There are many different brands of chalk paint from which to choose, as well as colors. I love this method because it is insanely simple. You do not need to sand, scrape, or prep your pieces at all. Yes, you read that correctly – no prep! Once you have your piece selected and the color picked out, you’ll just need to gather the tools to begin. Most chalk paints involve a few steps. Be sure to read the paint can for that manufacturer’s instructions as their steps and brushes may vary.
Generally, I plan on about two to three hours to complete my piece, depending on its size. The quart-sized cans of paint seem pricey per ounce, but they cover so much ground you can actually do more than one item with each. You’ll want to apply one to two coats of chalk paint on average to achieve the desired coverage. It dries quickly so I often go back for the second coat shortly after finishing the first. I like to keep some of my pieces a mix of painted surface and wood for a little character. While in the painting phase, you can also decide to layer more than one color, and then distress it with sandpaper for a more rustic/shabby chic feel. This accent is perfect for detail areas such as edges, spindles, curves, and raised portions of the piece. Once your paint is dry, you will want to wax the surfaces to provide a protective finish. For waxing, you have two options – typically, you would use a clear wax, but dark waxes that create an antiqued feel are also available. Simply brush on the wax and then use a cheesecloth to rub the wax deeper into the sur-face, sealing all the nooks and crannies.
The final step in chalk painting is one you may decide to do later – but I get impatient at times and just can’t wait for the final “ta-da!” Use an old t-shirt to buff out the wax to the desired level of sheen you want on the piece. There is so much room to manipulate the finish with color selections, distressing, buffing, etc. that you can really change it up and keep layering until you achieve the perfect finish.
Once the furniture transformation is complete, it’s time to accessorize. I love combining old décor pieces with new and adding in a different color each year to freshen up the feel of a room for the new year. Small touches of color that are incorporated into little spaces in each room really help tie the whole space together. A great place to start looking is at your local antique shops – many treasures are waiting to be found. Pick one décor item like an oversized sign or personalized piece to build around that you can rest on your newly refreshed dresser. For instance, old cans or buckets can be filled with fresh flowers or mixed greenery to flank the sign. Stacking old books with a frame on top or an old tobacco basket with a wreath in it are just a couple of tiny ideas to set a cozy scene.
Cheers to the new year and new design ideas incorporated into your homes! Take the plunge and give it a try – you just might learn to love painting and decorating after all.
Kasey Wright
Owner of AR Workshop Raleigh, offering hands-on graphic design and DIY workshops in a studio boutique.

