A One-Two Holiday Baking Punch
Pumpkin spice is in the air. Halloween and harvest decorations have been popping up in the stores for a little while now. And many stores are already covered in Christmas lights and extension cords. All of this can only mean one thing – it’s almost time for the upcoming holiday bonanza season! And, even more exciting, it means it’s time to plan for all the baked goodies to share at all the fun and amazing parties you will be invited to over the next couple of months.
To that end, I have a “one-two punch” for you. That’s right … one recipe that can be easily tweaked for two very different holiday treats! Let me introduce you to my easy pastry dough … it’s simple, versatile, and is sure to become your new baking best friend. This little gem can be a sweet treat and an amazing savory snack too.
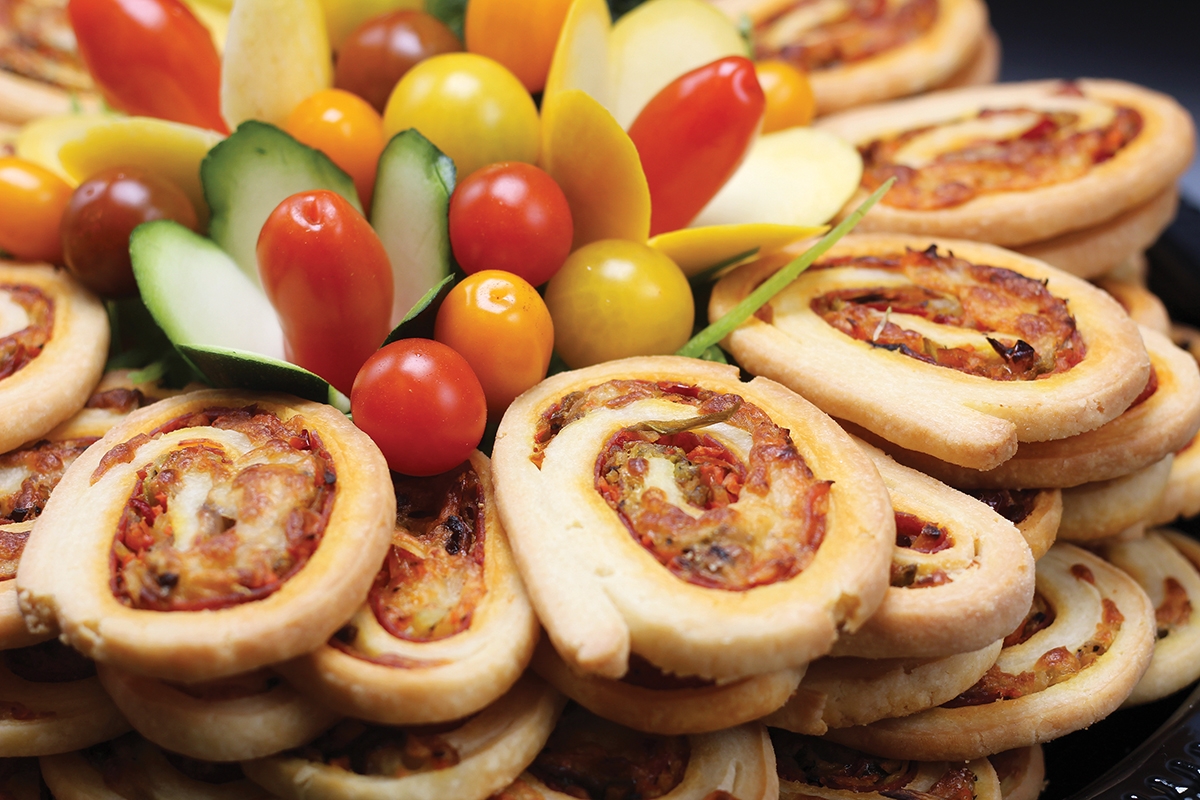
It was such a surprise to me when I started my job that the chef here also used what I have always considered “my” go-to pastry dough recipe. He uses it as the base dough for his much beloved and heavily-ordered appetizer collection of savory pinwheels. In my world, this pastry dough was the base of my “Tea-Time Teasers,” a recipe passed down to me from my grandma. After all my years making Christmas treats with this dough, I never once thought of using it to make something savory. Well, color me surprised! Trust me, once you try this dough, you will be hooked on its ease of preparation and how quickly it comes together. It is made with simple ingredients that you may already have on-hand, and you can make a big batch and portion it out to store in the freezer for later use.
There are so many different uses for this dough! Be creative and let your culinary imagination carry you away. But let me introduce you to two treats – Tea-Time Teasers and Chili-Chorizo Pinwheels – that will have you on everyone’s invite list this holiday season.
Basic Pastry Dough
– 8 ounces cream cheese, softened
– 2/3 cups butter, softened
– 2 cups all purpose flour
– 1½ teaspoons baking powder
– 1 teaspoon salt
Beat together cream cheese and butter in a mixer until thoroughly combined and completely smooth. Add the flour, baking powder, and salt. Beat well until dough comes together. Wrap dough in plastic. Place in the refrigerator for 15 minutes to get firm for rolling. Batch can easily be doubled and frozen. Simply separate into appropriate size portions, wrap in plastic wrap, and store in freezer container. Best if used within three months.
Chili-Chorizo Pinwheels
Chorizo Filling
– 1 pound Mexican chorizo sausage
– 1 medium onion, finely diced
– 2 tablespoons masa Flour (or substitute 2 tablespoons of regular flour ... it will work, but masa
tastes better)
– 1 cup shredded cheddar or quesadilla cheese (can be found at most grocery stores)
In a skillet over medium high heat, add chorizo and onions and cook until the chorizo crumbles and the onion is translucent (about 8 minutes). Add masa flour and cook until it thickens. Let cool.
To assemble, form the dough into a rough rectangle. You will want to try to retain this shape while rolling out. Roll out the dough to about 1/4" thickness, maintaining the rectangular shape. Spread the chorizo filling in a single layer over the dough, leaving about a ½ inch of space on all sides. Roll the dough from a long side (to make the log longer and thinner, not shorter and fatter). Put dough, seam side down, on a sheet pan and place in the freezer until firm, about one hour. Slice into 1/2" slices (they will be a bit of an oblong shape) and place on a parchment-lined sheet pan. Bake in a 350-degree oven for about 20 minutes or until golden brown. Serve with chipotle raspberry dipping sauce.
Raspberry Chipotle Dipping Sauce
– 12 ounces frozen raspberries
– 1 tablespoon chipotle puree
– ½ cup sugar
Puree raspberry, chipotle, and sugar together. Strain to remove the seeds. Serve the sauce on the side.
Tea-Time Teasers
For this recipe, you will need small tartlet tins (can be found at specialty shops or online retailers). Just think bite-size when you are selecting the size to buy.
Pecan Filling
– 1 egg, beaten with a fork
– ¾ cup brown sugar
– ¼ teaspoon salt
– 1 tablespoon melted butter
– ½ teaspoon vanilla
– ¾ cup finely chopped pecans
Add all the ingredients into the bowl with the beaten egg and mix until incorporated.
Have a small dish of flour handy for filling the tins with the dough. It will help with pushing the dough down into the shape of the tin. Be sure to oil or spray the tins before you start filling them.
Scoop out a roughly teaspoon-size portion of the chilled pastry dough and roll it into a small ball between your palms. I would start with one or two “test tartlets” first to make sure you have the appropriate size ball of dough for the size and shape of your tin. Place the ball of dough in the bottom middle of the tin. Dip your thumb into the dish of flour, then use your thumb to push the dough ball down in the middle, forming an indent. From there, slowly start pushing the dough all along the bottom and up the sides of the tin, until it reaches just above the top of the rim. You want the dough to form as thin a crust as possible, but not leak when baked (it is a fine balance). Place a small dollop of the pecan filling into the tartlet. It will expand when baked, so don’t overfill or you will have a gooey mess.
Bake at 350 degrees for approximately 5-7 minutes or until filling is set and crust is browned. Let cool for a few minutes before removing from the tin. They do pop out somewhat easily (most of the time). You can use a toothpick to loosen the edges when needed, but usually they pop out if you hold them upside-down and squeeze lightly on the sides of the tin. By testing this first one (or two if you like), you can gauge the level of thickness of your pastry crust, the amount of filling, and the height of the sides.
After your test tartlets are baked, you can adjust the size dough ball you need for the remainder of the batch. Shape all the dough balls and place them in all the tins, then start forming them from there. Feel free to reuse the tartlet tins without washing until you have used up all your dough. Once you have finished making all the tartlets, wash your tins thoroughly (they will get baked on goo – I promise). Soak them in hot, soapy water for a bit, then wash. Pro tip: I recommend placing them upside down on a baking sheet and popping into the oven for a few minutes to help evaporate all the water and make sure they are completely dry before storing them.
Holly Hopkins
Holly has spent many years working with food, starting off at her Grandma’s elbow, making wedding cakes and cookies galore. Since then, she has been a manager and business owner and is thrilled to be combining her passions for high quality food and superior customer service at Chef Mario’s.
- chefmario@bellsouth.net
- www.chefmario.com
- 919-781-4141